Installation of a free Let's Encrypt SSL certificate with automatic renewal for the domain of the CRYSTAL v1.0 project.
February 28, 2025
upd: January 11
Contents:
Before working with this instruction, you must connect the domain.
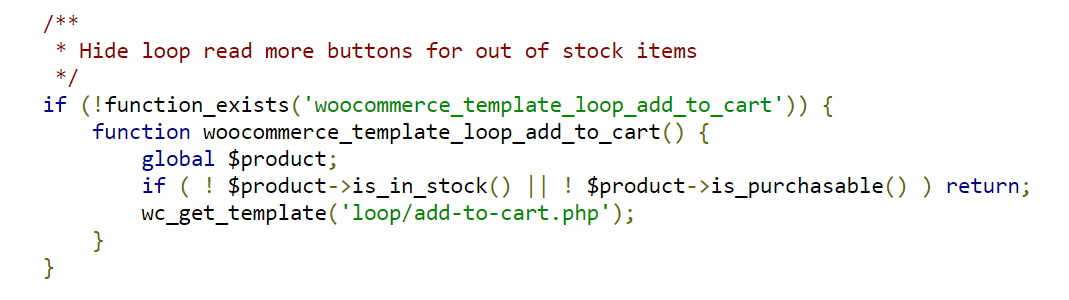
1. Changing the .env.prodDomain file in the frontend part to work via the 'https' protocol, and building the project for domain
⚠️ Security note
In this manual and in other sections of the documentation, the sudo -i command is used to switch to superuser (root) mode. This is done to speed up the process and reduce commands.
In a production environment, running as root all the time is not recommended, as it violates the principle of least privilege and significantly reduces the security of the
server.
Enable sudo:
sudo -i
Change the sample text to the name of your domain and enter the command:
cd /var/www/crystal/frontend && rm -vr ./env/.env.prodDomain && echo VITE_API_BASE_URL=https://YourDomain/api > ./env/.env.prodDomain && npm run build:prod:domain
Example:
cd /var/www/crystal/frontend && rm -vr ./env/.env.prodDomain && echo VITE_API_BASE_URL=https://crystal.you/api > ./env/.env.prodDomain && npm run build:prod:domain
2. Changing the .env.prodDomain file in the backend part of the project
Enter the command:
cd /var/www/crystal/backend && nano env/.env.prodDomain
In the window that opens, change the value of the variable - 'CORS_ORIGIN', from 'http://YourDomain' to 'https://YourDomain':
Next, add the variable - 'COOKIE_SECURE_STATUS':
COOKIE_SECURE_STATUS=true
After adding the code, press sequentially - 'ctrl + x', 'y', 'Enter'.
If set to 'Secure: true', cookies are sent only via HTTPS, which ensures that the entire request content, including the authorization JWT, is encrypted. This protects the token from being intercepted on open or insecure networks, such as public Wi-Fi, where attackers can analyze unencrypted traffic. It also prevents MITM attacks, where an attacker inserts himself between the client and the server and then intercepts or replaces data.
Enter the command:
systemctl restart nginx && pm2 restart 0
3. Installing certbot
Enter the command:
apt-get install certbot && apt install python3-certbot-nginx
4. Generating a Let's Encrypt SSL certificate
Enter the command and replace the sample text with your domain:
certbot --nginx -d YourDomain -d www.YourDomain
example:
certbot --nginx -d crystal.you -d www.crystal.you
Next, enter your email address. After entering the email, you need to read the questions and give some consent.
If there is an error during generation:
An unexpected error occurred:
AttributeError: can't set attribute
Enter the command - 'certbot --nginx -d YourDomain -d www.YourDomain', again.
When the certificate is ready, you will see a text like this in the console:
Successfully received certificate.
Nginx will reboot with the new settings.
Twice a day, the timer - certbot, will check the status of the certificate, and automatically renew the certificate if its expiration time is approaching.
You can make sure that the timer is present by entering the command:
systemctl status certbot.timer
After entering the command, you should see a message like this:
● certbot.timer - Run certbot twice daily Loaded: loaded (/lib/systemd/system/certbot.timer; enabled; preset: enabled) Active: active (waiting) since Tue 2024-01-23 04:50:45 UTC; 1h 23min ago Trigger: Tue 2024-01-23 20:06:16 UTC; 13h left Triggers: ● certbot.service Jan 23 04:50:45 crystal-vm-1 systemd[1]: Started certbot.timer - Run certbot twice daily.
5. Restarting the certbot timer after rebooting the VM
Enter the command:
systemctl enable --now certbot.timer
Open the project site with your domain, via the protocol - 'https', the SSL certificate should work.
Note: For easier understanding and quick installation, this instruction is simplified. When running the command to check the web server configuration:
nginx -t
a warning may appear:
[warn] 1672995#1672995: conflicting server name "www.YourDomain" on 0.0.0.0:443, ignored
This is not an error and does not affect the operation of the site. The server will continue to function correctly, and the SSL certificate will work and be updated automatically.
You can make your site faster and more secure by enabling HTTP/2 protocol support following these instructions.
Share


Comment on